Tag Applicators
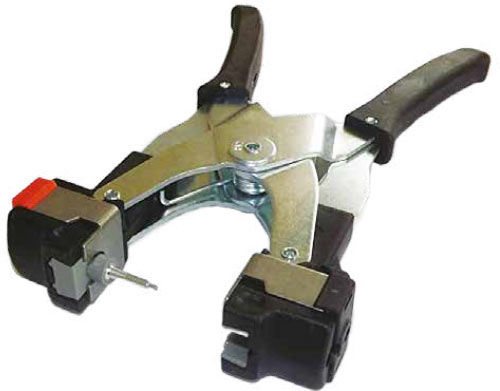
Tags must ONLY be used with the CAISLEY ear tag applicator.
What’s in the Flexoplus Geno Eartag pack for BVD sampling?
Tags
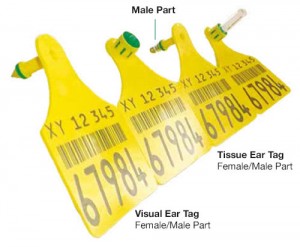 The male part of the tissue ear tag contains a stainless steel cutting blade. Please ensure this is secure before tagging. If this part is missing please contact us.
Clear zip seal bags
We have provided you with plastic bags to place your samples in. Please ensure the samples are placed in this bag and sealed before placing in the pre addressed envelope.
Pre-addressed
We have also provided you with a pre addressed envelope for the lab. Please ensure you write your address on the back of the envelope on the label provided. Please ensure correct postage is used prior to posting. At a minimum the package will be classed as a “large letter” by Royal Mail but for larger numbers of samples may cost more. If you require more zip seal bags or envelopes please phone us as these two layers are essential for posting.
Important Disclaimer Information
It is the herd owners responsibility to check tag numbers are correct and match the official registration for that animal.
Failure to correctly identify an animal could leadto financial loss for the owner of the animal.For information on our terms and conditions or to make a complaint please visit our website.
Things to take note of
- Pliers are supplied with a grey support ring on the metal guide pin in order to support the male part of the tag on insertion. If the support ring becomes detached – clip back into place.
- The cutting ring punches a hole into the ear and the tissue falls into the sample tube, which is then sealed airtight by the cutting disc.
- Do not remove sample tube near any gratings or drain covers to prevent loss!
- Check the healing of the wound after several days and disinfect the wound if necessary.
Flexoplus Geno Eartag fitting guide
Fit the tissue sample eartag first
Step 1
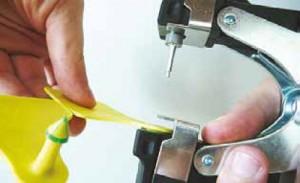
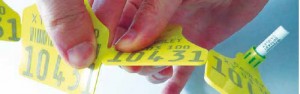 Separate Tags
Separate the four connected ear tag parts in the middle of the complete strip. Avoid all contact with the cutting ring at the tipof the disc. Place the visual ear tag on a clean surface.
Step 2
Load the tissue ear tag into the CAISLEY ear tag applicator, ensuring that the sequence is as follows:
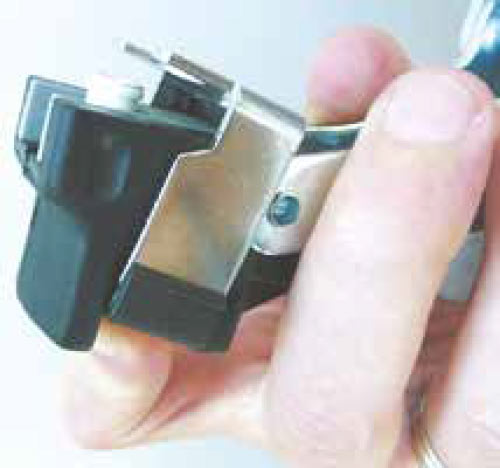
 Press the metal clip onto the lower jaws of the pliers (black clip) – pushing inwards and swivelling the clip to the back. The clip will now be tilting towards the pivot of the pliers.
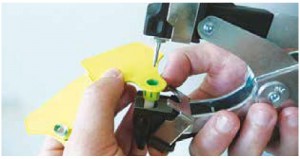 Insert the female part of the ear tag (with the tissue sample tube) into the jaw of the pliers – making sure that it is completely in place.
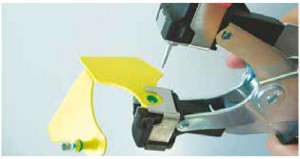 Release the clip.
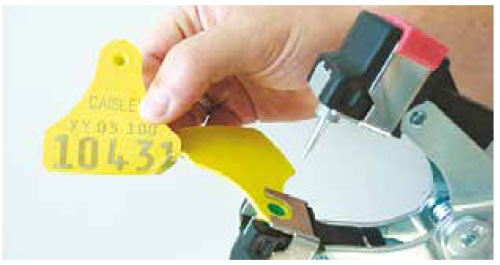
The female part will remain firmly in place.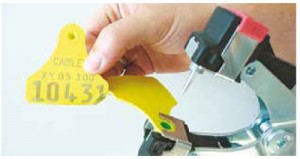 Separate the male part from the female part of the ear tag.


Step 3
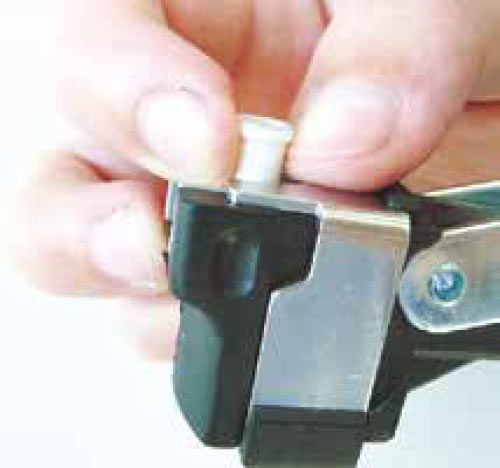
 Push the male part of the tag firmly onto the metal pin on the pliers. Grip the male part by the label to prevent contamination of the sample or infection of the ear. Do not touch the cutting ring and the pin. The pliers are now ready for taking the sample and applying the ear tag.
Please ensure steel cutting ring is attached to tip of male tag.
Step 4
Attach the tissue ear tag

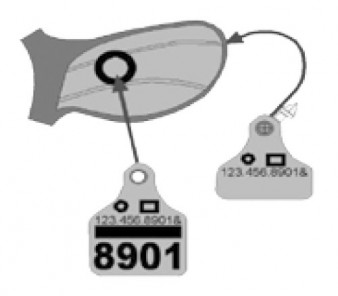
- between the two cartilage ribs
- without damaging blood vessels
- approx. 1/3 – 1/2 the length of the ear – measured from base of ear.
- male part on the outer ear and
- female part on inner ear.
CAUTION – Close pliers once, firmly and quickly until they stop and an audible click is heard.
Step 5
Close the Pliers
After closing as far as the stop, allow the pliers to spring open again. Pull the pliers away from the animal’s ear, in a downwardarc, so that the female part slides forwards out of the lower jawof the pliers.
Step 6
Remove the sample tube
In order to remove the sample tube from the pliers, press the vial, the black clip and metal clamp upwards so that the sample tube is released towards the front of the pliers. Proceed to release the metal clamp. The sample vial can easily be removed.
Please refer to the instructions on the back of this leaflet with regard to posting your sample to the lab.
Fit the visual eartag second
Step 1
Load the tissue ear tag into the CAISLEY applicator, ensuring that the sequence is as follows:
 Press the metal clamp with the black plastic clip onthe lower jaws of the pliers facing inwards.
 Insert the FlexoPlus ear tag under the metal clamp with the cylindrical locking element facing outwards. Do not touch the tip of the pin.
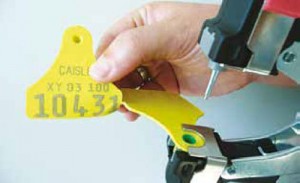 Separate the male apart from the female part.
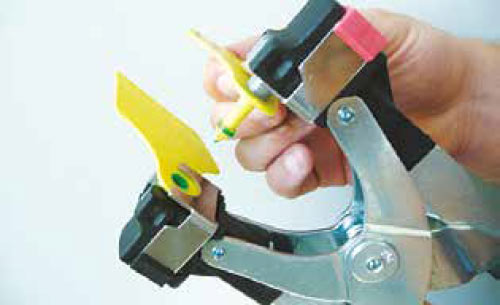
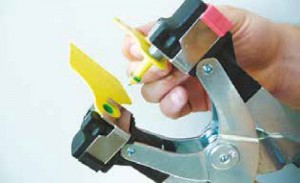 Push it onto the metal guide pin until it is over the lock end.
Grip the male part by the label in order to prevent infection of the ear wound– do not touch the pin.


Step 2
Attach the tissue ear tag
- between the two cartilage ribs
- without damaging blood vessels
- approx. 1/3 – 1/2 the length of the ear – measured from base of ear.
- male part on the outer ear and
- female part on inner ear.
CAUTION – Close pliers once, firmly and quickly until the stop and an audible click is heard.
Step 3
Close the Pliers
After closing as far as the stop, allow the pliers to spring open again. Pull the pliers away from the animal’s ear, in a downwardarc, so that the female part slides forwards out of the lower jawof the pliers.
Tel 028 8778 9770
Email info@bvdfreeni.com